Uncomplicated Approach to Immutable Operating Systems
Prior experience with Linux systems, visualization/containerization will be helpful for understanding this topic.
If you know about Linux, you might have come across the term "Immutable OS" before. One of the well-known distributions using this approach is Fedora Silverblue. That's why, for our sample scenarios, we will use Fedora Silverblue.
Immutable OS
In an Immutable OS, the root directory cannot be altered; it remains read-only. When you install a package, it creates a separate layer that runs independently from the root directory. This layer-based setup allows you to switch between these layers easily and revert to any previous layer, making the system very efficient. The main goal of the Immutable system is to maintain a clean and stable host OS, while also preventing the accumulation of clutter that can occur when installing numerous development tools and packages.
Fedora Silverblue
Fedora Silverblue is a type of desktop operating system that follows an immutable approach. It uses the rpm-ostree project to create its images. The system offers several advantages, including security, atomic updates, and immutability.
The main highlight of Fedora Silverblue is its distinctive way of managing software applications using rpm-ostree, setting it apart from other Linux distributions.
rpm-ostree is a hybrid system that combines libostree as its base image format and supports RPM on both the client and server sides. It shares code with the dnf project, particularly libdnf. This combination brings together the advantages of both approaches, offering a unique and efficient software management system.
rpm-ostree in Action
In a system with Fedora Silverblue installed, we will use rpm-ostree to install a dropdown terminal package called guake. Before proceeding with the installation, let's check the current status of our ostree.
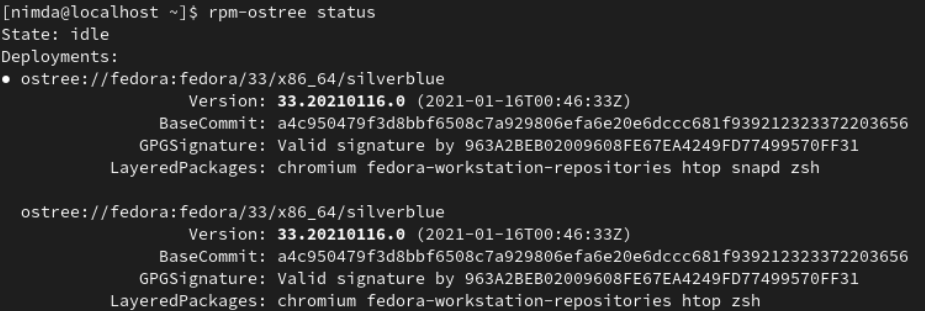
As shown in the screenshot, there are two layers in the system. The first layer includes packages like htop and zsh, while the second layer has an additional package called snapd installed. With this setup, you have the option to boot the operating system with or without snapd loaded, depending on your needs or preferences. This flexibility allows you to choose the desired configuration based on your requirements.
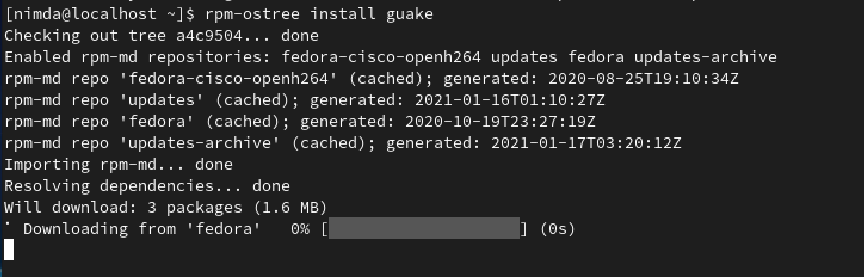
Now, let's run the command rpm-ostree install guake to install guake. This command will initiate the installation process for the guake package on your system.
Once the installation process is complete, it is necessary to restart the system to activate the new ostree layer. Without restarting, you won't be able to access the newly installed guake package. As mentioned earlier, rpm-ostree organizes packages in layers, so each time you install a new package, you need to boot the system with the last layer to make it available for use. Restarting the system ensures that the changes take effect, and you can access the guake package properly.
When booting the system, you will encounter a screen that looks like this:
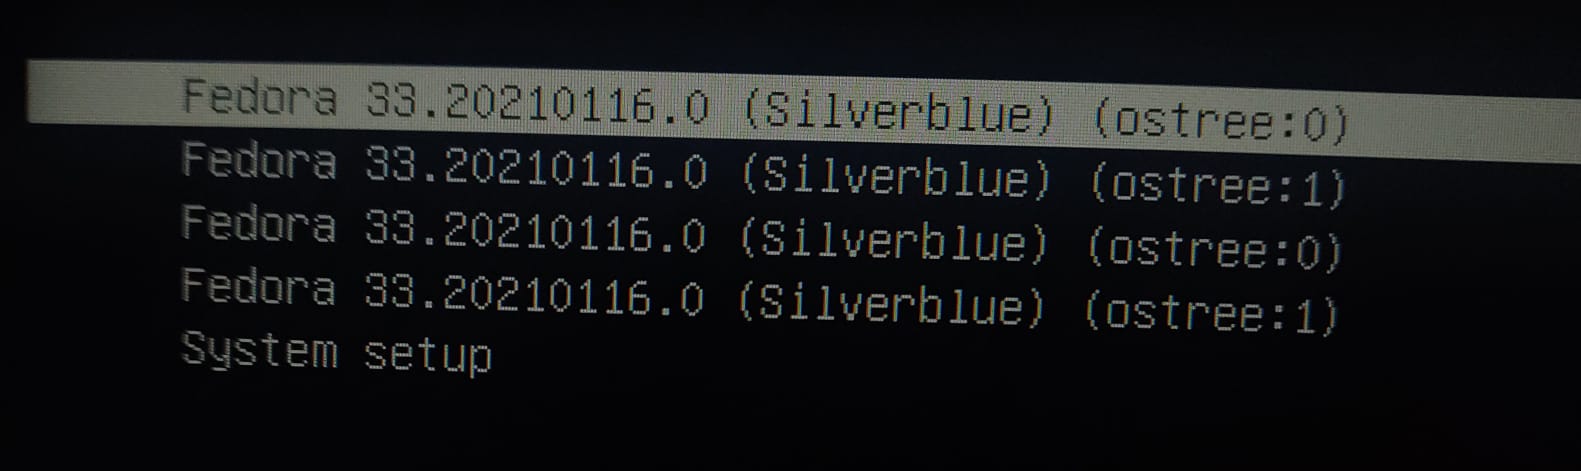
When you boot the system with the top layer selected, you will have access to the guake application on your system. The top layer represents the latest layer that was added, which includes the guake package. If you wish to boot the system without guake, you need to choose the second option, which would load the system without the top layer containing the guake package. This way, you can switch between different configurations based on whether you want guake installed or not.
The Alternative Way: toolbox
First and foremost, it's essential to understand that the toolbox and rpm-ostree are two distinct systems with different functionalities. The toolbox operates as a container-isolated and manually managed infrastructure, whereas rpm-ostree functions with a git-like infrastructure.
With the toolbox, you have the flexibility to open a single container environment that includes all packages you need, or you can choose to open separate container environments for each package. This allows you to work in isolated environments for different tasks or projects, enhancing security and maintainability.
On the other hand, rpm-ostree manages the system using a versioned approach similar to git, enabling atomic updates and rollbacks for the entire operating system, maintaining system integrity and stability.
Moreover, the package manager will be functional within the environments we create using the toolbox. In this example, we will set up a dedicated environment for dotnet and then proceed to install dotnet using dnf (Fedora's package manager) within that environment. Finally, we will be able to access the dotnet package we installed from outside the container, meaning from the host OS itself.
This workflow allows us to work with specific packages in isolated environments using the toolbox, ensuring that the changes made within those environments do not affect the host OS directly. Once the packages are installed, we can interact with them seamlessly from the host OS, making it convenient to develop and test software in a controlled and isolated manner.
First of all, what we need to do is create a container environment:

Once we have successfully created our container environment, the next step is to enter that environment. By accessing the container environment, we can perform various operational tasks.

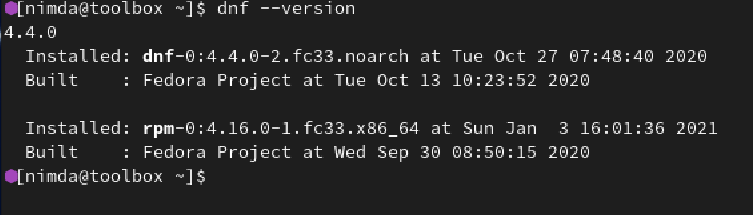
As mentioned earlier, we have the capability to use the package manager within toolbox environments. To confirm this functionality, we can execute the command dnf --version inside the toolbox environment.
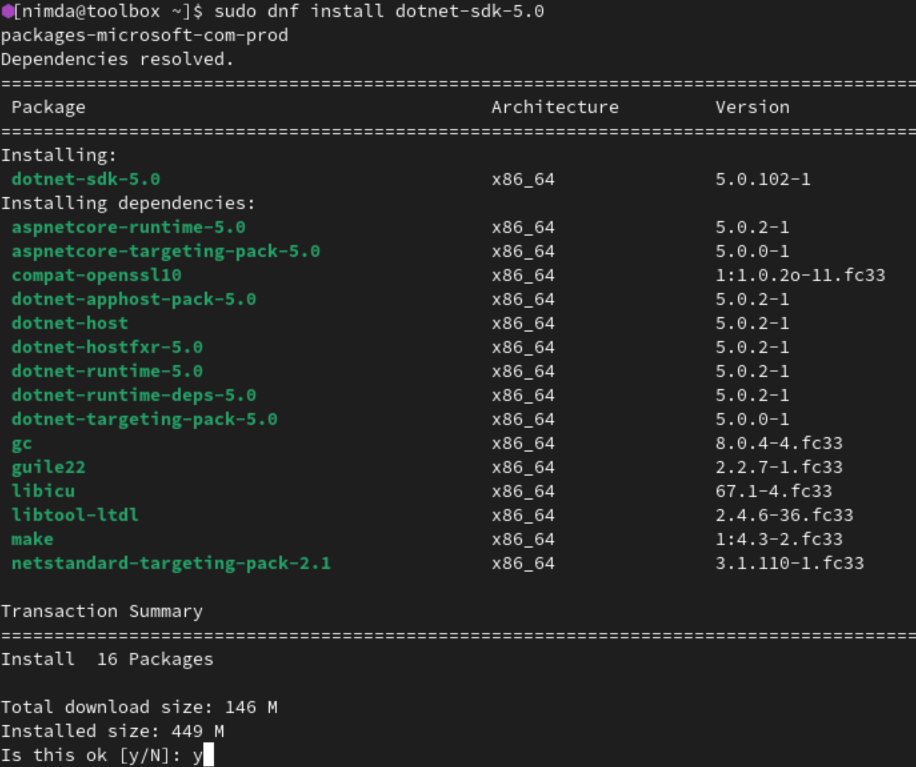
Now, we can use the command sudo dnf install dotnet-sdk-5.0 to start installation of dotnet.
Once the installation is done, we can use the dotnet framework in the container environment using the CLI. But, we can't access it directly from the Host OS. It stays separate and can only be used inside the container.
Let's attempt to use the dotnet CLI both inside and outside the container environment and observe the outcomes.
Attempt from the inside of the container environment: 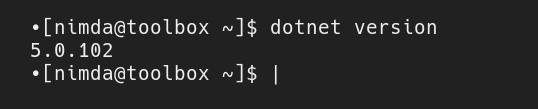
Attempt from the Host OS: 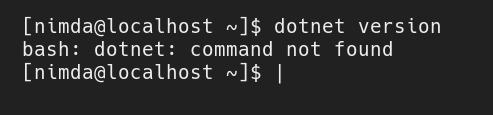
To execute the dotnet command without entering the environment, we can use a toolbox command like this: toolbox run --container dotnet-environment dotnet.
However, using this command wouldn't be very practical. If we wish to utilize dotnet as if it were installed in the system, we can define the command mentioned above as an alias. This way, we can run the dotnet command directly without the need for the lengthy toolbox command, making our workflow more efficient and user-friendly.
Put the following line inside the ~/.bashrc file.
dotnet='toolbox run --container dotnet-environment dotnet'
Now, you'll be able to use the dotnet CLI directly from the Host OS.